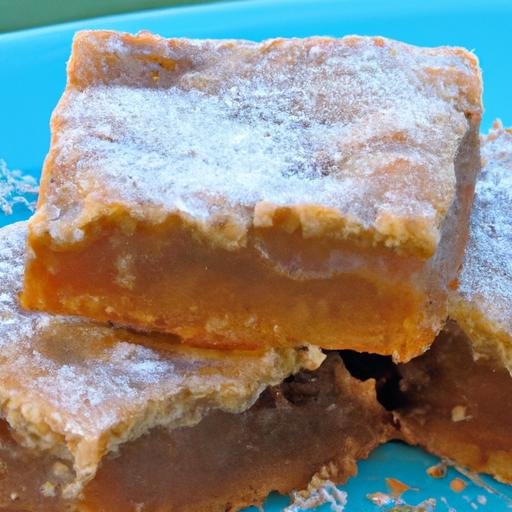
There’s something undeniably comforting about biting into a rich, nutty, chocolatey snack that feels both indulgent and homemade. Enter the beloved Bear Paws bars-a classic treat that combines layers of caramel,nuts,and gooey chocolate into one perfect handheld delight. While store-bought versions are widely enjoyed, crafting your own bear Paws bars at home opens a world of customization, freshness, and pure creative satisfaction. In this article, we’ll journey through the simple yet rewarding process of making these delicious DIY treats from scratch, ensuring each bite rekindles the magic of a timeless favorite with your own personal twist.
Crafting homemade bear paws bars brings a nostalgic embrace of tender pastries filled with luscious, sweet fillings that melt in your mouth. these delightful treats, inspired by classic Canadian bakery favorites, combine flaky dough with a signature filling that balances richness and texture, making every bite a warm comfort. Whether you’re baking for a cozy family brunch or craving an authentic pastry adventure, mastering the art of bear paws bars transforms ordinary ingredients into an exceptional homemade treasure.
Prep and Cook Time
- Planning: 45 minutes
- rest/Dough chilling: 1 hour
- Baking: 20-25 minutes
- Total Time: Approximately 2 hours
Yield
Makes 12 bars, perfect for sharing (or savoring solo!)
Difficulty Level
medium: Requires some dough handling and shaping skills but perfect for enthusiastic home bakers.
Gathering Authentic Ingredients for Perfect Bear Paws Bars
At the heart of truly excellent bear paws bars lies the quality and authenticity of ingredients. Use all-purpose flour, sifted, for that ideal delicate crumb, and cold, unsalted butter cut into small cubes to create perfect flakiness in the dough. For the filling, embrace premium brown sugar for deep caramel notes, and cinnamon sourced fresh or from a trusted spice rack to layer that warm spice character. Real vanilla extract brings out the subtle sweetness and complexity, while a touch of milk or cream ensures a tender crumb. Choosing locally milled flours or organic spices can elevate the flavor authenticity even further.
Mastering the Art of Dough Preparation and Shaping Techniques
start with chilled butter and flour – this is the secret to flaky layers. Use a pastry cutter or your fingertips to blend butter into flour until the mixture resembles coarse crumbs. The dough should be gently brought together with just enough milk to hold without becoming sticky. Chill the dough to relax gluten; this makes rolling out smooth and prevents shrinkage during baking.
when shaping, roll out the dough evenly, about ¼ inch thick. Cut rectangles around 4×3 inches, then fold with luscious filling inside. Achieving the classic “bear paws” look involves scoring or cutting shallow slits along the edges to mimic the “claws” that open beautifully while baking. use a sharp knife or pastry wheel for clean lines, and brush tops lightly with egg wash for a golden finish.
Creating the Signature filling and Achieving Ideal texture
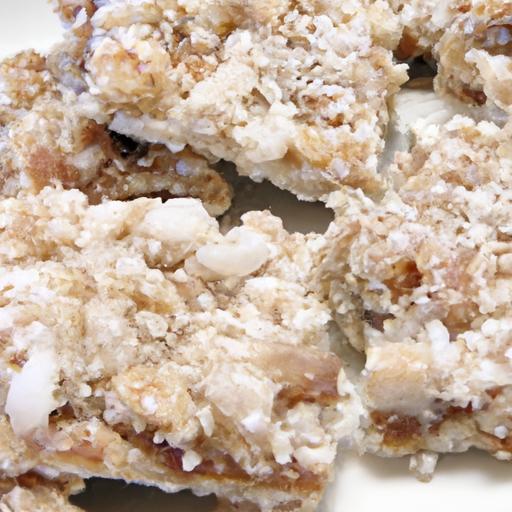
Create a rich, gooey filling that is neither too runny nor too dry. Combine brown sugar, ground cinnamon, a pinch of nutmeg, softened butter, and crushed walnuts or pecans for crunch. For extra decadence, a swirl of cream cheese or maple syrup can be folded into the mixture. The goal is a filling that holds shape yet oozes irresistible sweetness with every bite.
Balance is key – too much moisture will make your bars soggy, while too little results in dryness. Test by spreading a small amount on a piece of dough and adjusting sugar or butter proportions accordingly.
baking Tips and Creative Variations to Customize Your Bear Paws Bars
Bake on a parchment-lined sheet at 375°F (190°C) for 20 to 25 minutes, until edges are golden and filling bubbles invitingly. Rotate midway for even coloring. Let bars cool slightly to set filling and enhance texture.
- Try adding chopped dried fruit like apricots or cranberries for a fruity twist.
- Substitute walnuts with toasted almonds or pecans for flavor variety.
- For a vegan option, replace butter with coconut oil and milk with almond or oat milk.
- Drizzle with a simple powdered sugar glaze or warm maple drizzle before serving.
Don’t be afraid to personalize your bear paws bars – each batch offers a delicious new canvas to create your signature treat.
Ingredients
- 2 ½ cups all-purpose flour, sifted
- 1 cup cold unsalted butter, cubed
- ⅓ cup granulated sugar
- ¼ cup cold milk (or plant-based choice)
- 1 tsp pure vanilla extract
- 1 tsp baking powder
- ½ tsp salt
- For the filling:
- ½ cup brown sugar, packed
- 3 tbsp unsalted butter, softened
- 1 tbsp ground cinnamon
- ¼ tsp ground nutmeg (optional)
- ½ cup chopped walnuts or pecans
- 2 tbsp cream cheese (optional, for richness)
- 1 egg for egg wash
Instructions
- Prepare the dough: In a large bowl, whisk together flour, sugar, baking powder, and salt. Add cold butter cubes, cutting them into the flour using a pastry blender until coarse crumbs form.
- Add milk and vanilla: Gradually stir in milk and vanilla extract until dough just comes together. Avoid overmixing.
- Chill dough: Shape dough into a disk, wrap in plastic, and refrigerate for 1 hour to firm up.
- Make the filling: In a medium bowl, blend brown sugar, softened butter, cinnamon, nutmeg, and chopped nuts until creamy. Fold in cream cheese if using.
- Roll and shape: On a floured surface, roll chilled dough to about ¼-inch thickness. cut into 4×3 inch rectangles.
- Fill and fold: Spoon 1-2 tbsp of filling onto each rectangle, fold in half, and seal edges. Cut shallow slits on top to form “claws.”
- Egg wash: Beat egg and brush lightly on each bar for a glossy, golden crust.
- Bake: Place bars on parchment-lined baking sheet,bake at 375°F (190°C) for 20-25 minutes or until golden and filling bubbles.
- Cool and serve: Let bars cool 10 minutes before serving to set filling and enhance texture.
Chef’s Notes and Tips for Success
- Keep ingredients cold: cold butter and milk retain dough flakiness.
- Do not overwork dough: Overworking develops gluten causing toughness.
- Use parchment paper: Prevent sticking and enable easy transfer.
- Customize fillings: Swap nuts, add dried fruit, or mix in citrus zest for luminous notes.
- Make ahead: Dough can be chilled overnight; bake fresh for best results.
- Storage: Store cooled bars airtight for up to 3 days or freeze for longer.
Serving Suggestions
serve warm for the best gooey texture alongside a cup of strong coffee or herbal tea. Garnish with a light dusting of powdered sugar or a drizzle of warm maple syrup. For festive occasions, pair with whipped cream and fresh berries to brighten presentation and flavor.

| Nutrient | Per Serving (1 bar) |
|---|---|
| Calories | 320 |
| Protein | 4g |
| Carbohydrates | 40g |
| Fat | 15g |
Elevate your baking skills with our ultimate pastry guide and unlock even more delicious creations in your kitchen.
Q&A
Q&A: Crafting Homemade Bear Paws Bars: A Delicious DIY Treat
Q1: What exactly are Bear Paws Bars?
A1: Bear Paws Bars are a delightful homemade snack inspired by the classic bear Paws muffins-think moist, tender bars bursting with berries, nuts, and just the right touch of cinnamon. They combine the ease of portable bars with the nostalgic comfort of a cozy breakfast treat.Q2: Why make Bear Paws Bars at home instead of buying them?
A2: Creating Bear Paws Bars yourself means no preservatives, full control over ingredients, and the joy of customization. Plus, baking at home fills your kitchen with irresistible aromas that store-bought versions just can’t match-bonus: you get to enjoy them warm fresh from the oven!
Q3: What are the essential ingredients for homemade Bear Paws bars?
A3: At the heart of Bear Paws Bars are simple pantry staples: flour, oats, brown sugar, baking powder, and warm spices like cinnamon and nutmeg. For that signature flavor and texture, add in fresh or frozen berries (blueberries or raspberries work great), chopped nuts (walnuts or pecans), and a splash of vanilla extract.
Q4: Can I customize the bars to suit dietary preferences or allergies?
A4: Absolutely! Swap regular flour for almond or oat flour to make them gluten-free, use coconut sugar or maple syrup as a natural sweetener, and replace nuts with seeds like pumpkin or sunflower to keep them nut-free. Dairy-free baking? Substitute butter for coconut oil or vegan margarine.
Q5: How do I achieve the perfect texture-moist yet sturdy enough to hold its shape?
A5: The secret lies in balancing wet and dry ingredients. Incorporating yogurt or applesauce adds moisture, while oats and a moderate amount of flour create structure. Avoid overmixing the batter to keep the bars tender, and bake just until golden to prevent dryness.
Q6: Any tips for adding extra flavor or flair?
A6: Mix-ins like shredded coconut, chocolate chips, or a sprinkle of sea salt elevate the bars to gourmet territory. You can also drizzle a simple glaze made from powdered sugar and lemon juice or dust with cinnamon sugar before baking for a sweet, crunchy finish.
Q7: How should homemade Bear Paws Bars be stored?
A7: Store them in an airtight container at room temperature for up to three days, or refrigerate for extended freshness. They also freeze beautifully-just wrap individual bars and pop them in the freezer for a fast grab-and-go snack whenever the craving hits.
Q8: Can Bear Paws Bars be a good on-the-go breakfast option?
A8: Definitely! Their compact size and hearty ingredients make them perfect for busy mornings or outdoor adventures.Pair with a cup of coffee or your favorite smoothie, and you’ve got a wholesome, energy-packed start to your day.
Q9: What’s the easiest way to get started if I’m new to baking?
A9: Start with a simple recipe that uses straightforward measurements and common ingredients. Focus on mixing wet and dry ingredients separately before combining, and remember: baking is part science, part art. Don’t be afraid to experiment-each batch is a chance to perfect your personal Bear Paws Bars masterpiece!
Q10: Where can I find inspiration for flavors and variations?
A10: Look to seasonal fruits, your favorite spices, and even crowd-pleasing combos like peanut butter and jelly or apple-cinnamon. Food blogs, social media, and cookbooks dedicated to wholesome baking are treasure troves of creative twists to make your Bear Paws Bars uniquely yours.
Insights and Conclusions
As you wrap up your homemade Bear Paws Bars adventure, you’ll find that the magic lies not just in the sweet, flaky layers or the gooey filling, but in the joy of creating something truly your own. These bars are more than a treat-they’re a delightful blend of creativity and comfort that you can tailor to your taste buds. So next time the craving strikes,remember: with a little patience and a sprinkle of love,your kitchen can transform into a bakery of nostalgic delights.Happy baking, and may every bite of your Bear Paws Bars be as warm and satisfying as a homemade hug!